|
|
 |
|||||||||||||
|
3 Truck Heisler
Sound Installation Photographs:
I have done a six sound decoder installs when I came across the Litchfield Station website describing an install in a Rivirossi Heisler. I got excited and ordered the parts.
The following shows my experience installing sound in this loco. |
||||||||||||||
| For more info on Heisler Locomotives, see http://www.gearedsteam.com/heisler/heisler.htm Wikipedia, The Free Encyclopedia. |
||||||||||||||
| The Rivirossi HO 3 Truck Heisler Locomotive comes DCC ready. That means you can plug a small decoder (I had a Z scale decoder in it.) into the circuit board. It's tough to get the shell off so I dug out the instructions and found all the hidden screws. I used Soundtraxx DSD-090LC Light Steam with a micro oval speaker. This is the newer Heisler (I have an older one that may some day be converted to DCC but there's not enough room for sound too.) The third truck in this version doesn't have much space inside it. I actually taped four quarters inside to give it a little more weight to track better. There is a shaft that goes to it so the wheels are powered but there is no pick-up. All the wheels on the front two trucks are powered AND have pick-up. For this install I just disconnected the third truck and set it aside. The hardest part of this install was when the universal joint shaft came out of the front trucks. It was really hard to get both of them back in and the gears driving them to all line up. If you can help it, don't undo the screws under the gears on the bottom. They are the only ones that are slotted, all the rest (that you do take out) are phillips head screws. | ||||||||||||||
 You can see the circuit board and on the lower right where you would normally plug in a decoder. (I had a DZ-123 in there.) You have to take off the boiler to get the cab area off. Also it helps to take the roof off to fit things together later. You can see the circuit board and on the lower right where you would normally plug in a decoder. (I had a DZ-123 in there.) You have to take off the boiler to get the cab area off. Also it helps to take the roof off to fit things together later. |
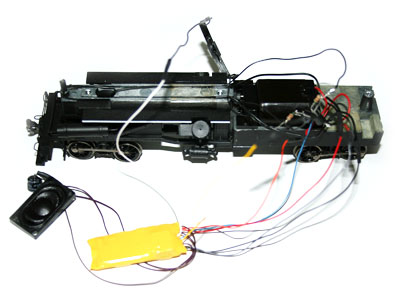 Using the instructions that came with the decoder I wired it to the loco's wires. I tested it with the motor and sound then again after I wired the lights. Using the instructions that came with the decoder I wired it to the loco's wires. I tested it with the motor and sound then again after I wired the lights. |
|||||||||||||
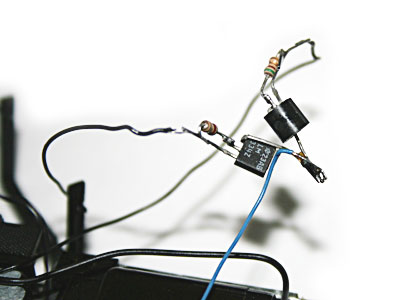 I don't understand that much about these small electronics but using a diagram from the Litchfield Station website I was able to get the lights to work!!! They are very helpful so if you have any questions I would suggest emailing them. Any questions other than this part, feel free to email me. I don't understand that much about these small electronics but using a diagram from the Litchfield Station website I was able to get the lights to work!!! They are very helpful so if you have any questions I would suggest emailing them. Any questions other than this part, feel free to email me. |
 This speaker came with a little white box that I thought would work perfectly for the back of the speaker. It was a tiny bit big so I used my black clay to seal it in. I also used a small ball squished on the bottom to hold it in place. (After everything is put together it now has a nice deep, rich sound! Yea!) This speaker came with a little white box that I thought would work perfectly for the back of the speaker. It was a tiny bit big so I used my black clay to seal it in. I also used a small ball squished on the bottom to hold it in place. (After everything is put together it now has a nice deep, rich sound! Yea!) |
|||||||||||||
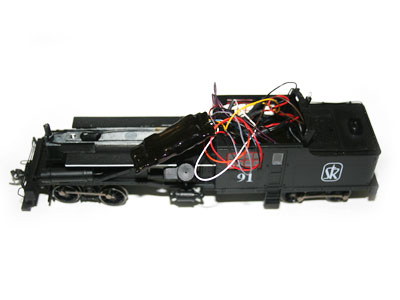 I used a black Sharpie to turn the yellow cover black so you don't see it looking through the window. I carefully made sure the wires were out of the way and got the shell back on. I used a black Sharpie to turn the yellow cover black so you don't see it looking through the window. I carefully made sure the wires were out of the way and got the shell back on. |
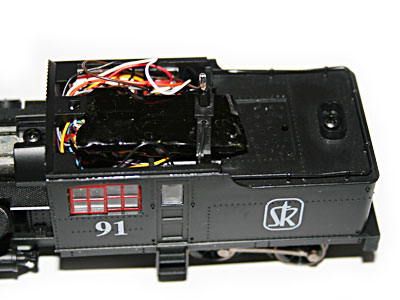 Here the decoder is in place and the wires pushed in. You can just see where I drilled some small holes for the speaker sound to come out. I might design a wood load to cover it up, but for now I'll use the oil bunker. Here the decoder is in place and the wires pushed in. You can just see where I drilled some small holes for the speaker sound to come out. I might design a wood load to cover it up, but for now I'll use the oil bunker. |
|||||||||||||
 Here is the oil bunker unmodified. Here is the oil bunker unmodified. |
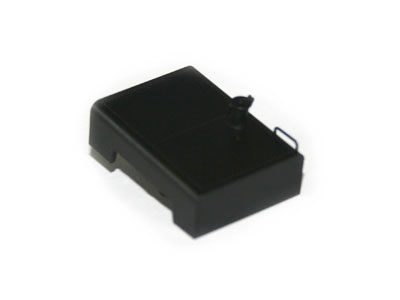 Here is the oil bunker with a slot for the decoder to slip through. I also had to remove the back windows but you can't see that because the bunker covers most of that up. Here is the oil bunker with a slot for the decoder to slip through. I also had to remove the back windows but you can't see that because the bunker covers most of that up. |
|||||||||||||
 |
||||||||||||||
|
Here it is back on the layout all put together. While I was at it I changed the couplers to Kadee #58s. Even though it comes with similar type couplers I've found that they don't connect as well as metal to metal does. Eventually I'd like to re-letter and re-number most of my steam locomotives, but for now I think it's fine because this loco is headed to a Pulp Mill down the layout.
Coming Soon a short movie showing this loco in action! |
||||||||||||||
